Last Updated: November 12, 2026
Quick Summary
Tattoo composition is the arrangement of every element in a piece so the whole reads as one design, covering scale, placement, flow, balance, and how the eye moves across skin. Plan it by mapping the design onto your body, picking an anchor image, and layering supporting elements, transitions, and negative space.
- Photograph the tattoo area from three angles and measure its widest and narrowest points before drawing.
- Build a sleeve in four layers: anchor, supporting elements, transitions, and planned negative space.
- Set a color rule early, whether monochrome, limited-palette, or full color, and treat it as a boundary.
- Break the piece into zones so each session builds on healed work rather than racing ahead.
- Strong shapes and clear contrast age better than fine detail, which blurs as skin changes.
Table of Contents
- What Tattoo Composition Meaning Really Covers
- How to Plan a Tattoo Layout Around Your Body
- How to Design a Cohesive Tattoo Sleeve
- Balancing Focal Points, Negative Space, and Visual Flow
- Large Tattoo Design Ideas That Fit a Full Project
- Planning Sessions, Timeline, and Long-Term Readability
- Preparing for a Composition Consultation
- Book Your Composition Consultation
- Frequently Asked Questions
What Tattoo Composition Meaning Really Covers
Tattoo composition is the arrangement of every element in a piece so the whole reads as one design, not a pile of separate images. It covers scale, placement, flow, balance, and how the eye moves across skin.
Most people plan a large piece by gathering images they like. That is mood, not composition. Composition asks harder questions:
- Where does the eye land first?
- How does the design move with the body?
- What connects one section to the next?
- Where does skin stay open on purpose?
Get those answers early and the rest of the project falls into place. Skip them and you end up covering gaps later.
How to Plan a Tattoo Layout Around Your Body
Planning a tattoo layout means mapping your design onto your actual body before anyone touches a needle. Skin is not a flat canvas. It curves, stretches, and moves. A layout that ignores anatomy will fight you for years.
Start with a body template. Trace or photograph the area at rest and in motion. If you are still deciding which areas suit a large piece, see our guide to the best body parts for large scale tattoos. Then sketch rough shapes over it. The goal is to see how the design sits on your frame, not how it looks on paper.
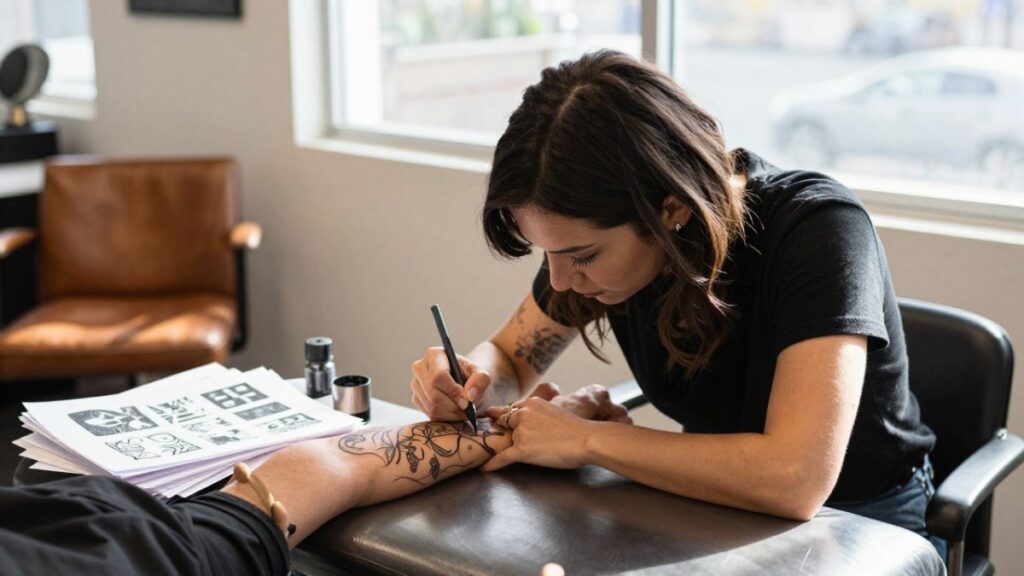
Body Mapping and Measurements
Body mapping is the old-school practice of marking out zones on the body before drawing begins. Artists have done this for decades.
- Photograph the area from three angles
- Note where skin creases, stretches, or folds
- Mark natural borders like the elbow, knee, or collarbone
- Measure the widest and narrowest points of the area
Those numbers tell you how much room you actually have. Guessing is how designs end up cramped at one end and empty at the other.
Placement, Limb Flow, and Body Shape
Placement decides how a design reads. A piece that flows along a limb looks longer and leaner. One that cuts across it can look chopped.
Body shape matters too. Curves change how a design wraps. A composition built for a flat back will distort on a rounded shoulder. Bring references that show the design on a real body, not just a sketch.
If you want a deeper walkthrough of placement decisions, our guide on how to pick tattoo placement covers the trade-offs in detail.
How to Design a Cohesive Tattoo Sleeve
A cohesive tattoo sleeve is built around one core idea, then expanded outward in layers. The theme holds the sleeve together even when the individual images differ. Without that spine, a sleeve becomes a scrapbook.
Pick your anchor first. That might be a central image, a color palette, or a visual language like black-and-gray realism. Everything else supports it. From there, build in layers rather than all at once:
- Layer 1, Anchor: the single boldest image, placed where the eye lands first (usually the outer upper arm or shoulder cap).
- Layer 2, Supporting elements: secondary images that frame the anchor and echo its shapes or values.
- Layer 3, Transitions: background fill, wind bars, dotwork, or shading that stitches sections together so no hard edges interrupt the flow.
- Layer 4, Negative space: planned open skin that keeps the sleeve from reading as a solid block.
Transitions are where most sleeves succeed or fail. A common pattern is to let background elements cross over the boundaries between images so the eye reads one continuous surface rather than a series of framed pictures.
Set a color rule and stick to it. If the anchor is black and gray, adding a single saturated color later can pull focus away from the center.
Decide the order images appear on the arm before the first session. Once the sequence is set, consider how each image’s colors will sit against the skin so the sleeve feels cohesive from shoulder to wrist, with VANCITYSKIN as a useful next point of reference.
Watch out: adding a new image to a healed sleeve without checking how its scale and value compare to the existing work is the most common way a cohesive sleeve turns patchy. Bring the whole sleeve, not just the new idea, to the planning conversation.
The custom tattoo design process walks through how a design gets built step by step, which helps if you want to see how cohesion gets planned before the first session.
Balancing Focal Points, Negative Space, and Visual Flow
Balance in a large tattoo comes from contrast: heavy against light, dense against open. A focal point is where you want eyes to land. Supporting elements guide attention there. Negative space is the open skin that lets the design breathe.
Beginners often fill every inch. That is the most common mistake we see. Crowded designs turn into gray mush at a distance.
Think in layers:
- Focal point: the boldest, most detailed image
- Supporting elements: smaller shapes that frame it
- Transition: swirls, shading, or dotwork that connect sections
- Negative space: planned gaps that keep it readable
Flow follows the body. On an arm, that usually means shoulder to wrist. On a leg, hip to ankle. Work with the grain, not against it.
Large Tattoo Design Ideas That Fit a Full Project
Good large tattoo design ideas share one trait: they scale. A concept that only works small will fall apart across a whole back or leg.
Here are directions that hold up at scale:
- Japanese-style imagery with waves, wind bars, and a central figure
- Black-and-gray realism built around one large portrait or scene
- Geometric and ornamental patterns that repeat and wrap
- Nature themes like florals, forests, or ocean scenes
- Mythological or storytelling pieces with multiple figures
The test is simple. Shrink the idea to a thumbnail. If it still reads, it will work large.
Planning Sessions, Timeline, and Long-Term Readability
A large project takes multiple sessions, and the schedule is part of the composition. Plan it before the first needle, not after. Healing time between sessions matters as much as the work itself, because tattooing over skin that hasn’t fully settled can distort lines and slow recovery.
A practical workflow most artists follow:
- Consultation and concept lock. Agree on theme, placement, scale, and style before any drawing time is booked.
- Draft review. Review the design in person or as a digital proof, and confirm the composition reads at full size, not just on a screen.
- Session sequencing. Break the piece into zones, for a sleeve, often shoulder and upper arm first, then forearm, then wrist and hand, so each session builds on healed work rather than racing ahead of it.
- Healing windows. Spacing sessions apart gives skin time to settle, and lets you see how the healed work reads before continuing.
- Final review and touch-ups. Schedule a review once the piece is healed to catch any areas that need reinforcement.
Revision boundaries are worth setting up front. Ask what can change between sessions, small adjustments to shading or transition elements are usually fine, but moving the anchor image or changing the overall scale after work has started can force a redesign of everything around it.
Long-term readability is the part most people skip. Skin changes. Lines soften. Fine detail blurs over time, and sun exposure accelerates that. A composition with strong shapes and clear contrast ages better than one packed with tiny lines.
Scale and contrast are the two levers that matter most for aging. A design that relies on high contrast between dark and light areas will still read when lines soften; one that depends on fine linework in a low-contrast area will turn to gray mush. Ask your artist how the design will look over the years.
A large project runs on a sequence, and each stage has its own job before the next one starts.
| Stage | What happens |
|---|---|
| Consultation and concept lock | Agree on theme, placement, scale, and style |
| Draft review | Confirm the composition reads at full size |
| Session sequencing | Break the piece into zones, building on healed work |
| Healing windows | Space sessions so skin settles before continuing |
| Final review and touch-ups | Catch areas that need reinforcement once healed |
Preparing for a Composition Consultation
A composition consultation is where the plan gets real. Come prepared and you will get far more out of it.
Use this checklist:
- Reference images sorted by what you like about each
- Photos of the body area from several angles
- Your budget range and timeline
- Questions about the artist’s style and approach
- Any medical or skin considerations
- A rough idea of size and placement
Our consultation guide lists the exact questions to bring so the conversation stays productive.
Book Your Composition Consultation
The hardest part of a large tattoo is committing to a plan you will live with for decades. Working through the composition with your artist before the first session helps you commit with confidence.
Whether it is your first large piece or your fifth, a planning conversation can help you shape it properly.
Contact Sideshow Tattoo and Piercing to talk through your idea. For the practical steps to schedule, read our guide on how to book a custom tattoo consultation.
Ready to plan a piece that fits your body and your story? Our artists will walk you through every step, from first sketch to final session.
Frequently Asked Questions
What is the 1/3 rule in tattoo composition?
The 1/3 rule is a composition guideline that divides a design area into thirds and places the main focal point near one of those division lines rather than dead center. On a large tattoo composition, that means the strongest element, like a face or a bold motif, sits slightly off-center so the eye moves through the piece instead of stopping in one spot. It is a starting point, not a strict law, and your artist may adjust it to fit your body shape and the flow of the limb.
Should you plan a tattoo sleeve all at once?
Plan the whole sleeve concept before the first session, even if you complete it over multiple sessions. A full plan lets the artist map focal points, negative space, and transitions so each new section connects to the last. You can still leave room for changes as the work progresses. The key is a cohesive design draft and a session schedule, not locking every detail on day one. Bring reference images and your core idea to the consultation so the artist can build the layout around your arm.
How do you prepare for your first large tattoo project?
Start with a pre-consultation checklist: gather reference images, write down your core idea and theme, note any existing tattoos the new work must connect to, and decide on a realistic budget and timeline. Think about placement and how the design should follow your body shape. Ask about session length and healing time between appointments. A good artist will review body mapping, flow, and negative space with you before drawing a design draft, so arrive ready to talk about the visual language you want.
How do you make a large tattoo design look cohesive?
Cohesion comes from a shared visual language: consistent line weight, a limited color or black-and-gray palette, repeated shapes, and transitions that carry one element into the next. Plan the composition as a whole before any ink goes on, using a full-body template or body mapping sketch. Give the piece one clear focal point and let supporting elements reinforce it. Layering and contrast help separate sections, while planned negative space keeps the design readable as it ages.