Quick Summary
The best tattoo placement for a small design depends on how visible you want it, how much pain you can tolerate, and how the skin there will age. Visible spots like the wrist and fingers suit bold, simple symbols, while the inner bicep, ribs and calf hide small pieces well and tend to hold their detail longer.
- Thin lines need flat, stable skin, so avoid areas that move a lot, like joints.
- Hands and fingers get heavy friction and washing, so lines soften sooner there.
- Inner wrist designs usually hurt more than outer-forearm ones because the skin is thin.
- Short words in block letters age better than long phrases in thin cursive.
- Write the words at the real size on paper and tape them to the spot for a day or two before committing.
Table of Contents
- Why Placement Matters More for Small Tattoos Than Large Ones
- Visible Placements: Wrist, Inner Wrist, Finger, and Hand
- Small Tattoo Placement Ideas That Stay Hidden
- Small Word Tattoo Placement Ideas and How Text Ages
- Pain, Healing, and Aftercare by Body Area
- Tattoo Placement Chart: Visibility, Pain, and Longevity Compared
- Booking Your Small Design: What to Bring to a Placement Consultation
- Frequently Asked Questions
Tattoo Placement Ideas for Small Designs That Work
Last Updated: November 7, 2026
Small tattoos ask a lot of their placement. A fine-line flower or a three-word quote has very little room to work with, so where you put it matters as much as what it looks like. A question that comes up often is where a small design should go so it looks sharp for years? The right spot depends on how visible you want it, how much pain you can handle, and how the skin in that area is likely to change over time.
Why Placement Matters More for Small Tattoos Than Large Ones
A large tattoo has room to absorb a little blur. For a fuller walkthrough on how to pick tattoo placement before you commit, see how to pick tattoo placement. A small one does not. Fine lines and tight details rely on clean spacing, and skin that stretches, bends or gets a lot of friction will soften them faster. That is why a tiny design in the wrong spot can look muddy within a few years, even when the artwork was done well.
- Thin lines need flat, stable skin to stay crisp.
- Areas that move a lot, like joints, wear designs down faster.
Visible Placements: Wrist, Inner Wrist, Finger, and Hand
Wrist, inner wrist, finger and hand placements are the most visible options. They suit people who want their tattoo to be part of how they present themselves every day. They also make a small design easy to show off in conversation.
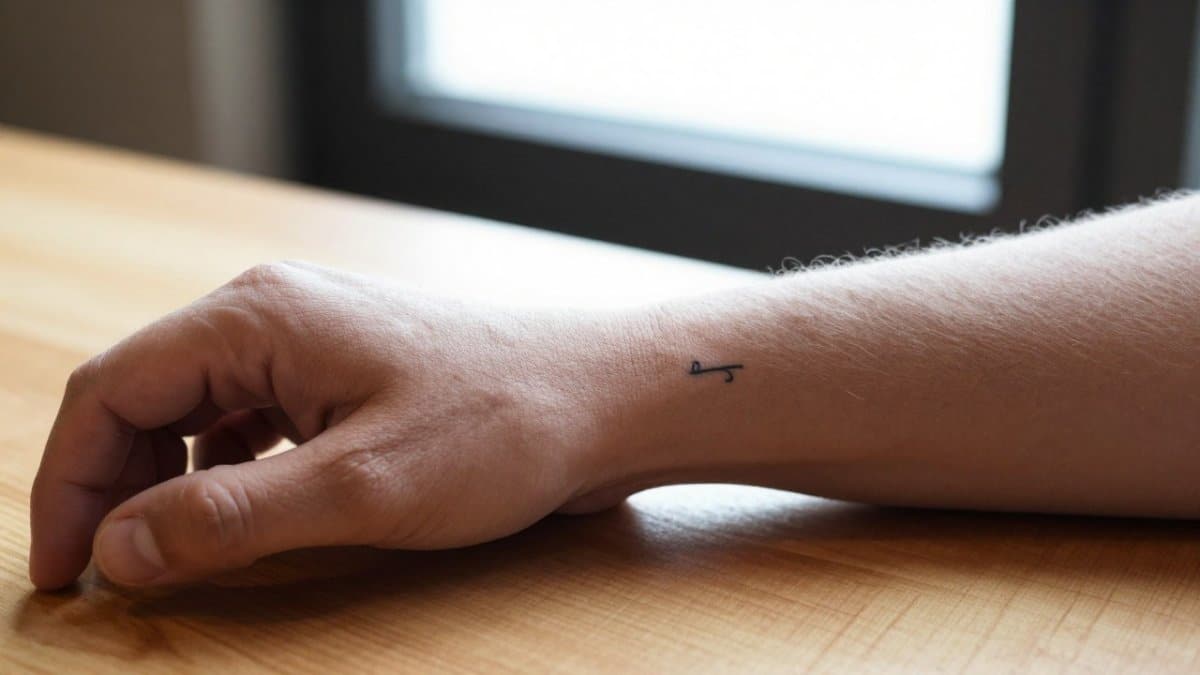
These spots come with trade-offs:
- They are seen by everyone, which is the point for many people, but also means you cannot easily hide them at work.
- Hands and fingers get a lot of friction and washing, so lines may soften sooner.
- Inner wrist designs usually hurt more than outer-forearm ones because the skin is thin.
A simple, bold-lined symbol usually holds up better in these areas than a very detailed piece.
Small Tattoo Placement Ideas That Stay Hidden
If you want a small tattoo you can keep private, look at the upper ribs, the back of the upper arm, the inner bicep, the calf and the top of the foot. These areas are covered by normal clothes and are easy to ignore on a daily basis.
- Ribs and side torso: Easy to hide, but healing can be uncomfortable because of movement and breathing.
- Inner bicep: Covered by most short sleeves and fairly low in pain for many people.
- Calf and ankle: Hidden under pants and socks, and the skin is generally sturdy.
Small Word Tattoo Placement Ideas and How Text Ages
Words and names are a special case. Letters need consistent spacing, and that spacing can blur over time. Short words in a clean script usually age better than long phrases packed into a small space.
A common mistake is choosing a spot where the text has to curve around a joint. The letters then distort every time you move, which makes the wording harder to read as the years pass.
Choosing a Spot for Quotes and Names
For quotes and names, a flat, stable area is the safest choice:
- The inner forearm, away from the wrist crease
- The upper back or along the spine
- The side of the calf, where the text can run in a gentle line
Before you commit, write the words at the actual size on paper and tape them to the spot. Live with it for a day or two.
Pain, Healing, and Aftercare by Body Area
Most placement guides treat healing as one universal set of instructions. In practice, a small tattoo on the inner wrist and a small tattoo on the top of the foot are healing under completely different conditions, and the aftercare that keeps one crisp can undermine the other. The pain question and the healing question are also linked: the spots that hurt most are often the spots that demand the most careful follow-through.
Why Pain Varies by Placement
Pain is not a single dial. It comes from three things: how thin the skin is, how close the needle works to bone or cartilage, and how many nerve endings sit in the area. Thin skin over bone, like the inner wrist, the collarbone, the ankle bone and the ribs, tends to feel sharper. Fleshy areas with a cushion of muscle and fat, like the outer forearm, the outer calf and the upper arm, are usually more comfortable.
- Inner wrist and ankle bone: thin skin over bone, sharper sensation, and the skin moves constantly.
- Ribs and sternum: high nerve density and breathing movement make longer sessions harder.
- Fingers and hands: frequent use and washing make both the tattoo session and the healing window more demanding.
Placement-Specific Healing Constraints
The first two weeks decide how much detail survives. Small designs have less margin for error, so the friction and moisture around a placement matter more than they would on a large piece.
- Hands and fingers: constant handwashing, sanitizer, and gripping objects dry the skin and pull at fresh lines. Expect more touch-up risk here than almost anywhere else.
- Feet and ankles: socks, shoes, and bedsheets rub the area for hours at a time. Loose footwear and a clean sock change matter more than any single aftercare product.
- Ribs and side torso: breathing and side-sleeping create constant micro-movement. Sleeping on the opposite side for the first week reduces irritation.
Watch out: moisturizing a foot or hand tattoo and then immediately putting on a sock or glove traps moisture and bacteria against fresh ink, which is one of the most common causes of patchy healing in these spots.
Aftercare That Actually Fits the Placement
The core rules are the same everywhere: keep the tattoo clean, follow your artist’s washing and moisturizing schedule, and keep it out of direct sun. What changes is the friction management.
Sun protection deserves its own note for small designs. Fine lines and light ink fade faster than bold work, and a small piece on the forearm or ankle sees more sun than most people realize.
For step-by-step guidance, see our page on tattoo aftercare made simple.
Tattoo Placement Chart: Visibility, Pain, and Longevity Compared
A chart is only useful if it helps you make a decision, so this one adds two columns most placement guides skip: how much usable flat space the area offers for a small design, and how the placement tends to age. Ratings are general guides, and individual experiences vary.
| Placement | Visibility | Typical Pain | Usable Space for a Small Design | Aging and Legibility |
|---|---|---|---|---|
| Finger and hand | High | High | Very small; single symbol or short word | Lines soften fastest; friction and washing blur fine detail |
| Inner wrist | High | Moderate to high | Small; a short word or compact symbol | Moderate; thin skin and movement soften fine lines |
| Outer forearm | Medium to high | Moderate | Generous; small designs sit comfortably | Good; stable skin holds detail well |
| Inner bicep | Low to medium | Low to moderate | Moderate; protected and flat | Good; low sun exposure helps |
| Ribs and side torso | Low | High | Moderate but curved; design must follow the contour | Moderate; movement and breathing can distort over time |
| Calf and ankle | Low | Low to moderate | Moderate; side of calf is flatter than the ankle bone | Good on the calf; ankle bone is less forgiving |
| Behind the ear | Low to medium | Moderate | Very small; best for simple shapes | Moderate; hair and glasses create friction |
| Upper back and spine | Low | Moderate | Generous; good for short quotes | Good; flat and easy to protect from sun |
How Small Designs Age in Different Spots
A small tattoo does not fail all at once. It fails at the edges first. Skin that stretches, folds, or rubs causes ink to spread slightly over the years, and a design with tight spacing has no room to absorb that spread. Three factors drive most of the change:
- Movement and folding: joints and creases, like the wrist crease, finger knuckles, and the side of the ankle, flex constantly. Lines placed across a crease distort with every bend.
- Friction: hands, feet, and behind-the-ear placements contact objects, shoes, and hair all day. Friction is the main reason fine detail on fingers fades faster than anywhere else.
- Sun exposure: forearms, ankles, and the back of the neck see more sun than the inner bicep or ribs. UV exposure breaks down ink particles and is the leading cause of fading on exposed small designs.
A practical rule many artists follow: if the smallest gap in the design is thinner than a credit card edge, it is probably too fine for a high-friction or high-movement placement. Bold lines and simple shapes survive; hairline detail and tiny lettering do not.
Using the Chart to Decide
Read the chart in the order that matches your priorities. If concealment is the priority, start with the low-visibility rows and then check pain and aging.
Watch out: choosing a placement purely because it looks good in photos ignores the aging column, and a small design that blurs in two years is the most common regret artists hear about.
The chart is a starting point for your consultation, not a substitute for it.
Booking Your Small Design: What to Bring to a Placement Consultation
Before your appointment, bring a few reference images, and note the exact spot you are considering. Measure the size you have in mind so you and your artist can talk in real numbers.
A good consultation covers three questions: will this design hold up in this spot, how should it be sized, and what aftercare will it need? If you are still choosing an artist, our guide on how to find a reputable tattoo artist walks through what to look for. When you are ready to book, book a custom tattoo consultation to plan your small design with our team.
Ready to plan your small design? Sideshow Tattoo and Piercing offers custom tattoo consultations in San Diego, and our artists will help you match the design to the right spot.
Frequently Asked Questions
Where is the best place to get a small tattoo?
There is no single best spot. The right place depends on how visible you want the design to be, how much pain you can tolerate, and how the area ages. Inner wrists, the upper arm, the ribs, and the back of the ear are popular choices for small designs. Discuss your options with a tattoo artist during a consultation.
Do small tattoos look better on the wrist or ankle?
Each has trade-offs. The wrist is highly visible and gets a lot of friction from watches and clothing, which can soften fine lines over the years. The ankle is easier to hide but sits on skin that can swell and rub against shoes. Both work for tiny designs when the linework is kept bold enough to hold up. Ask your artist which area suits the specific detail in your design.
Which tattoo placements tend to hurt the least?
Areas with more fat and muscle cover, such as the outer upper arm, the outer thigh, and the calf, generally feel less intense than bony or thin-skinned areas like the ribs, the inner arm, or the ankle bone. Pain varies widely from person to person, and a small design takes a short session, which often makes the experience more manageable. Eating well and resting before your appointment can also help.
How do I choose the right placement for a small tattoo?
Start with three questions: how often you want to see the design, how it will fit with your daily routine and work environment, and how long you want it to stay crisp. Then consider the design itself. Fine details need flat, stable skin, while a simple symbol can handle a curved area. Bring reference photos to your consultation and ask the artist to place a stencil on your body so you can see the size and angle before committing.